In this guide we'll show you how Private Online Courses i.e invite-only courses work on Ylurn. To follow along make sure you have signed up for an institute account.
Private Online Courses are ideal for teachers when they want only their own students to have access to the course.
Step 1 - Create a Course
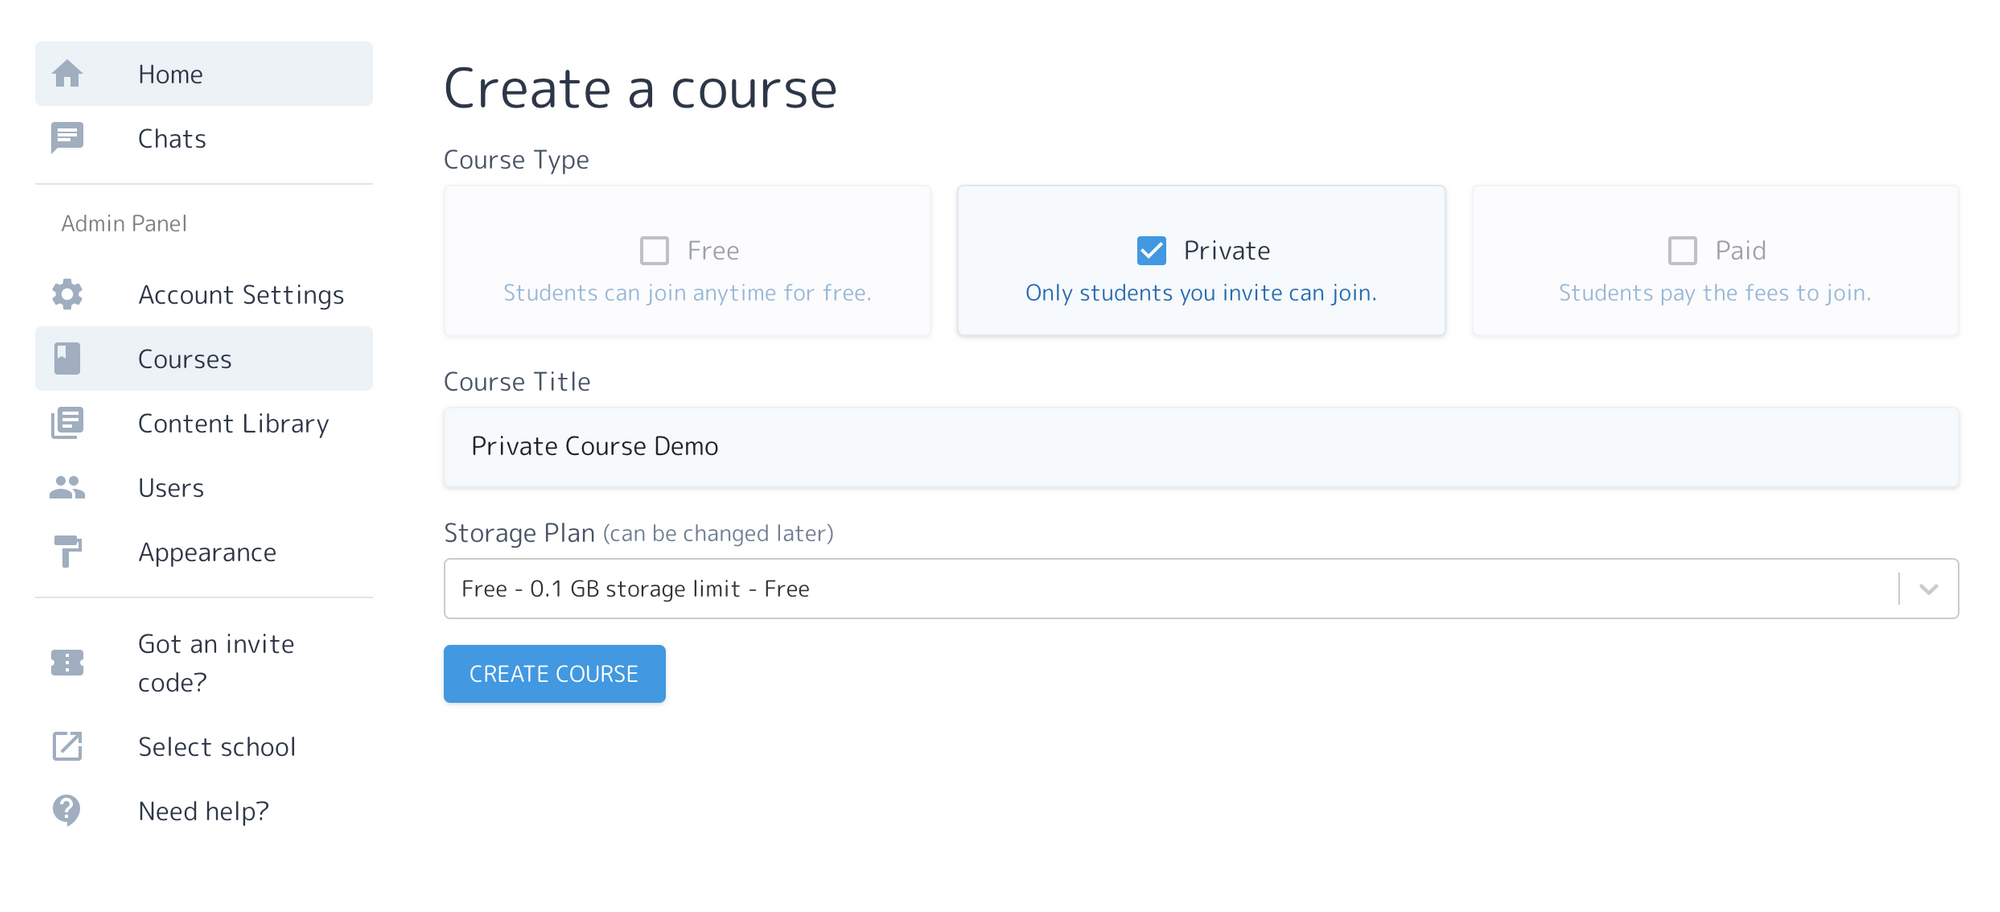
Go to your institute's dashboard page. From the "Courses" page, click the "New Course" button. This will open the Create a Course page. In the form
- Select "Private" as the Course Type
- Enter a Course Title
- Select Free plan for Storage Plan

Click "Create Course". This will create your private course.
Step 2 - Invite Students
Now that you have created a Private Course, the next step is to invite students.
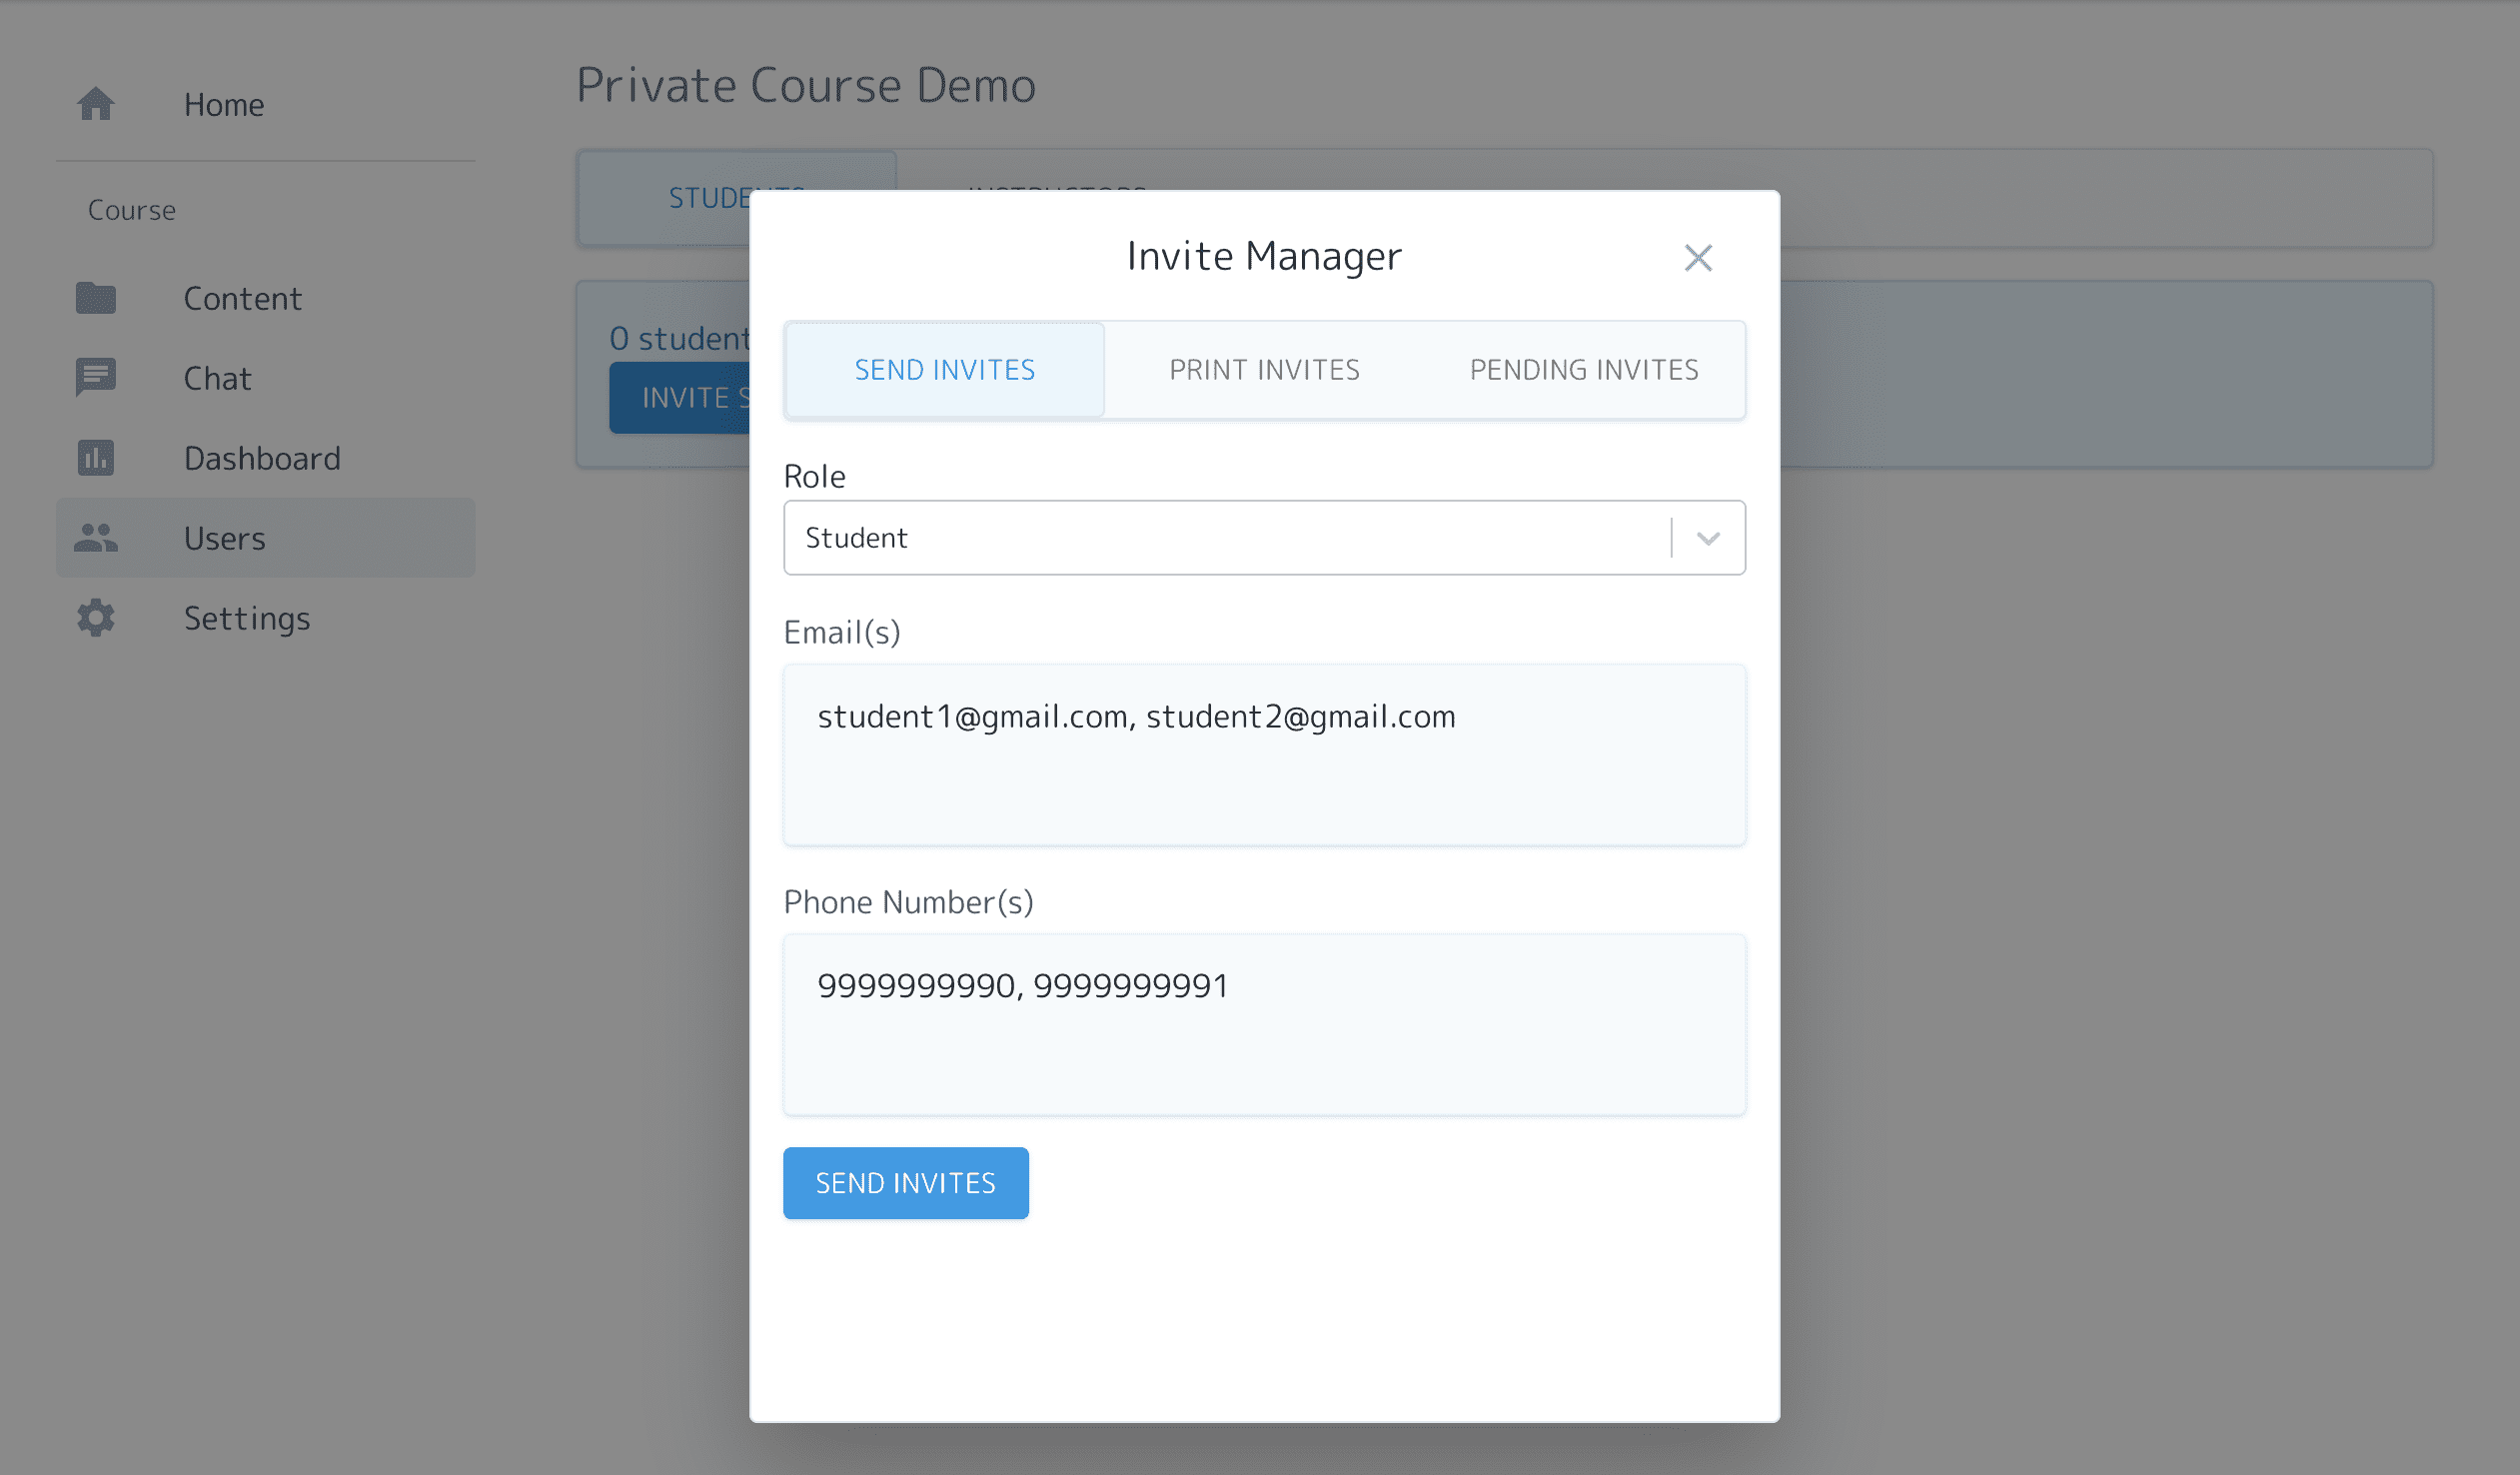
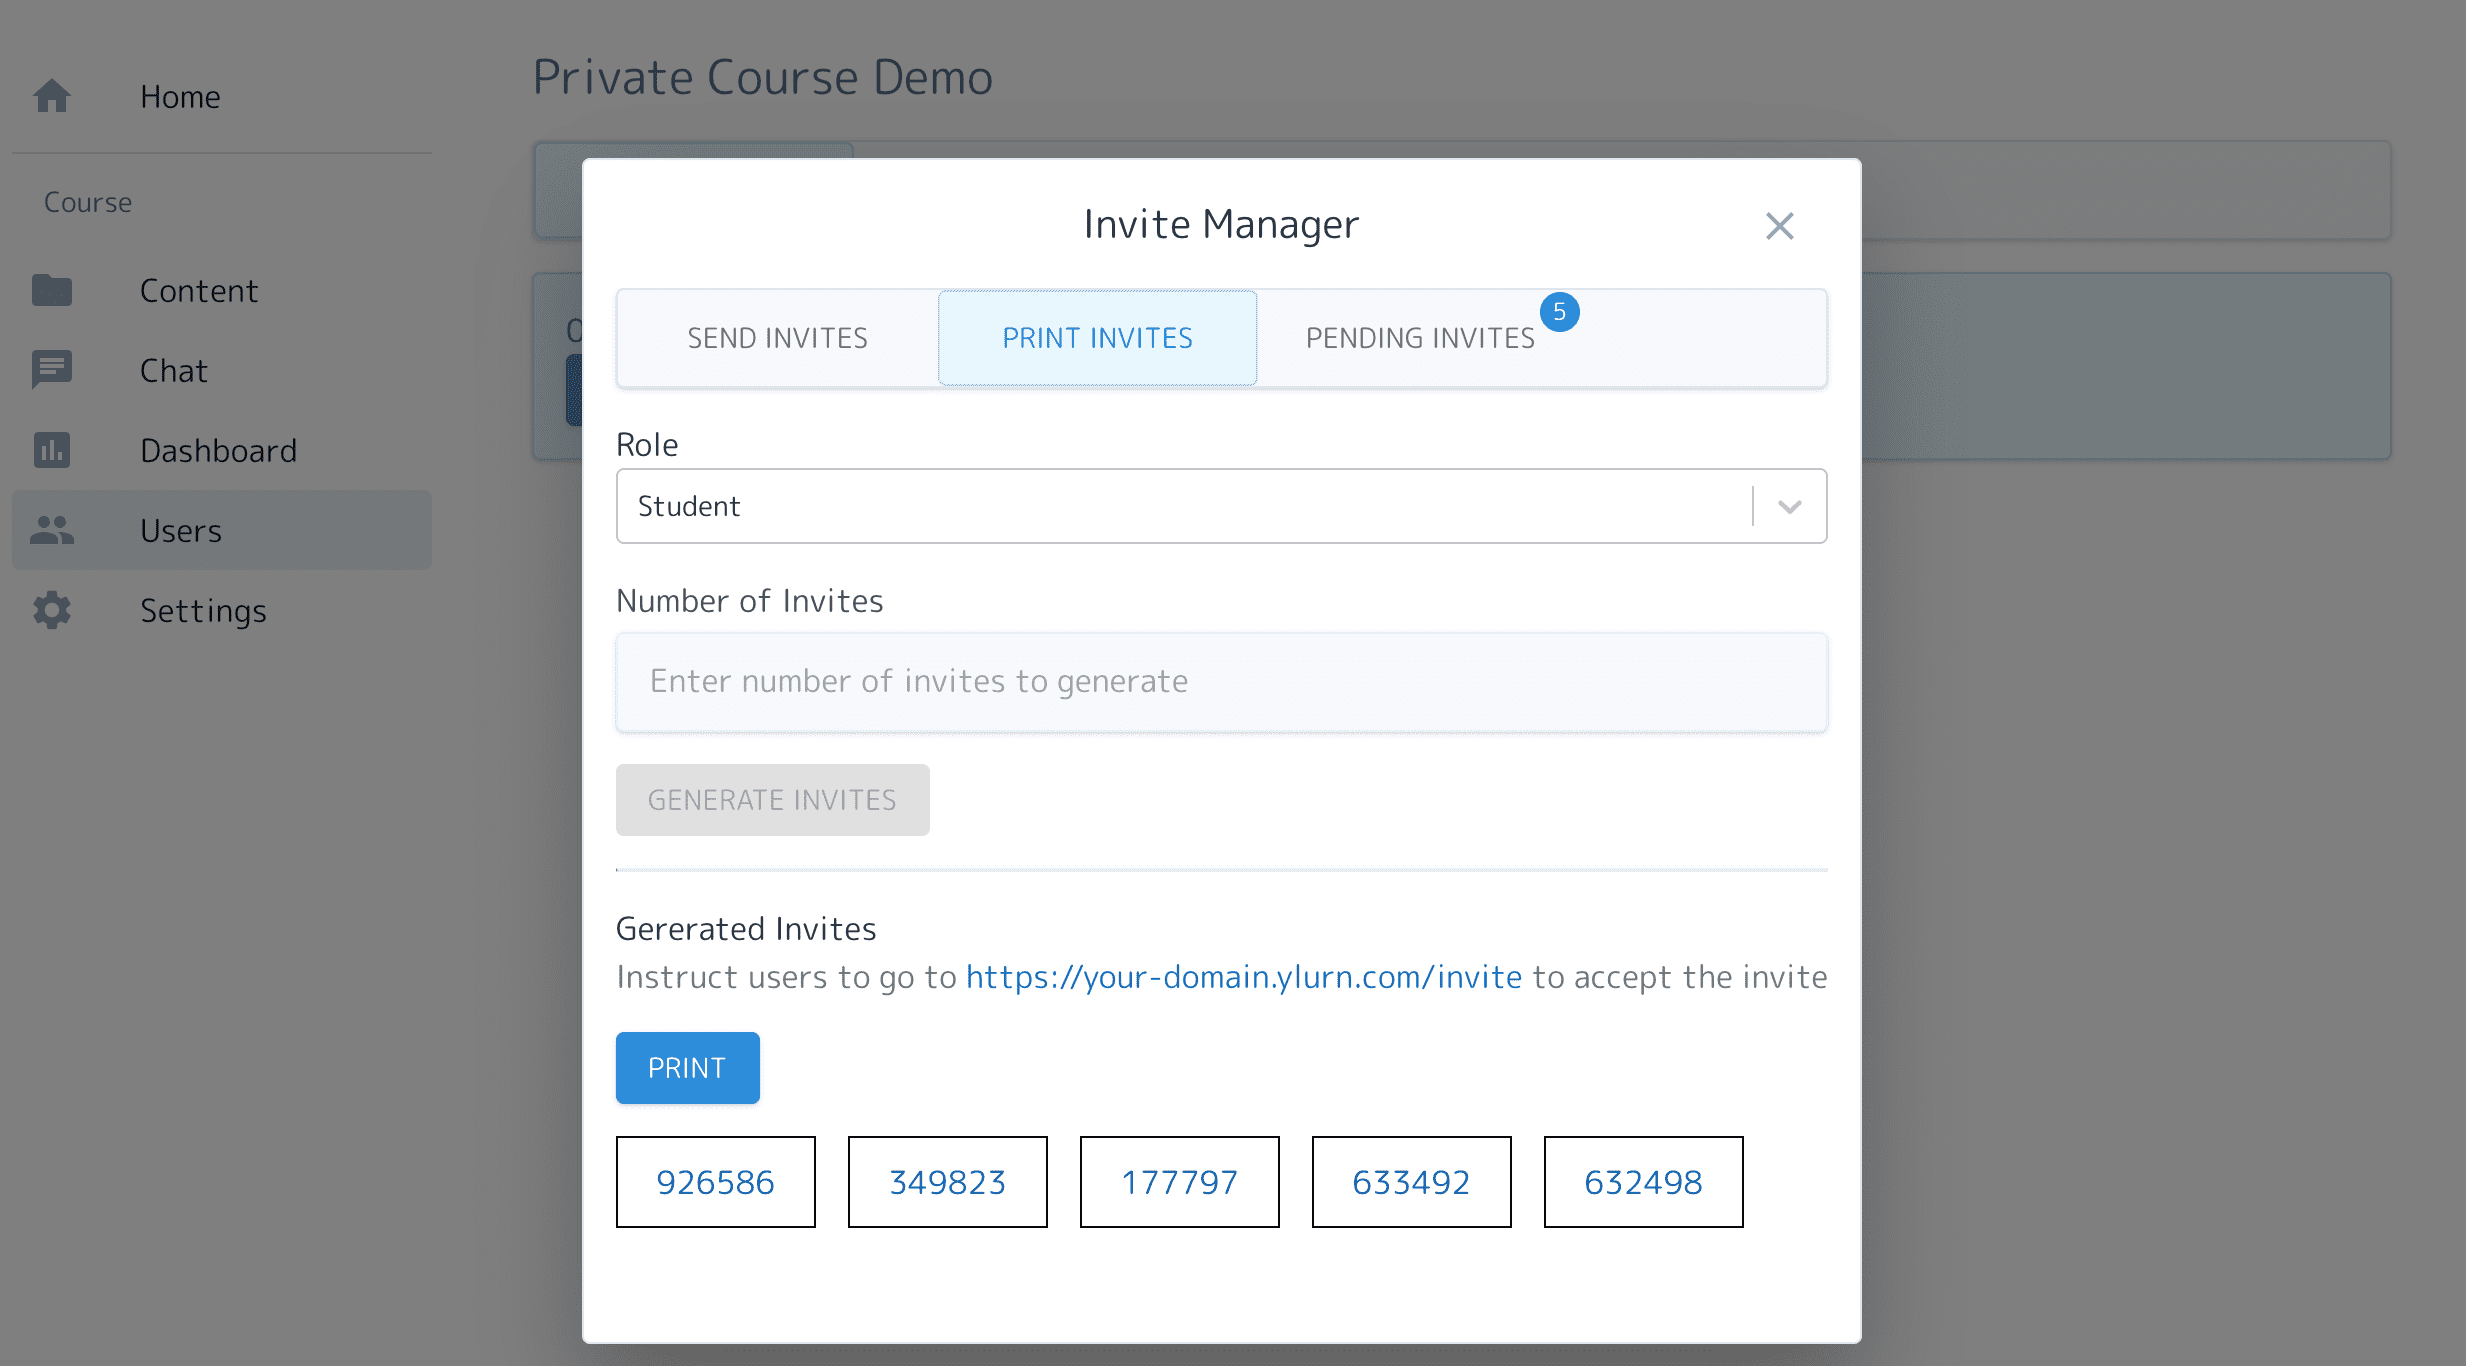
Each student requires a unique invite code to join a Private Course. These unique invites codes can be sent to students by providing their email addresses, phone numbers or by generating unique codes and manually distributing them.
To invite students, open the "Users" page.

On the "Users" page, click the "Invite Students" button to open the Invite Manager. Enter the student email IDs, phone numbers or go to "Print Invites" tab to generate invite codes for manual distribution.


Once you have shared/sent the invite codes to the students, they can visit the Invite page (your-domain.com/invite), enter their invite code and enroll in the course.

Step 3 - Upload Content
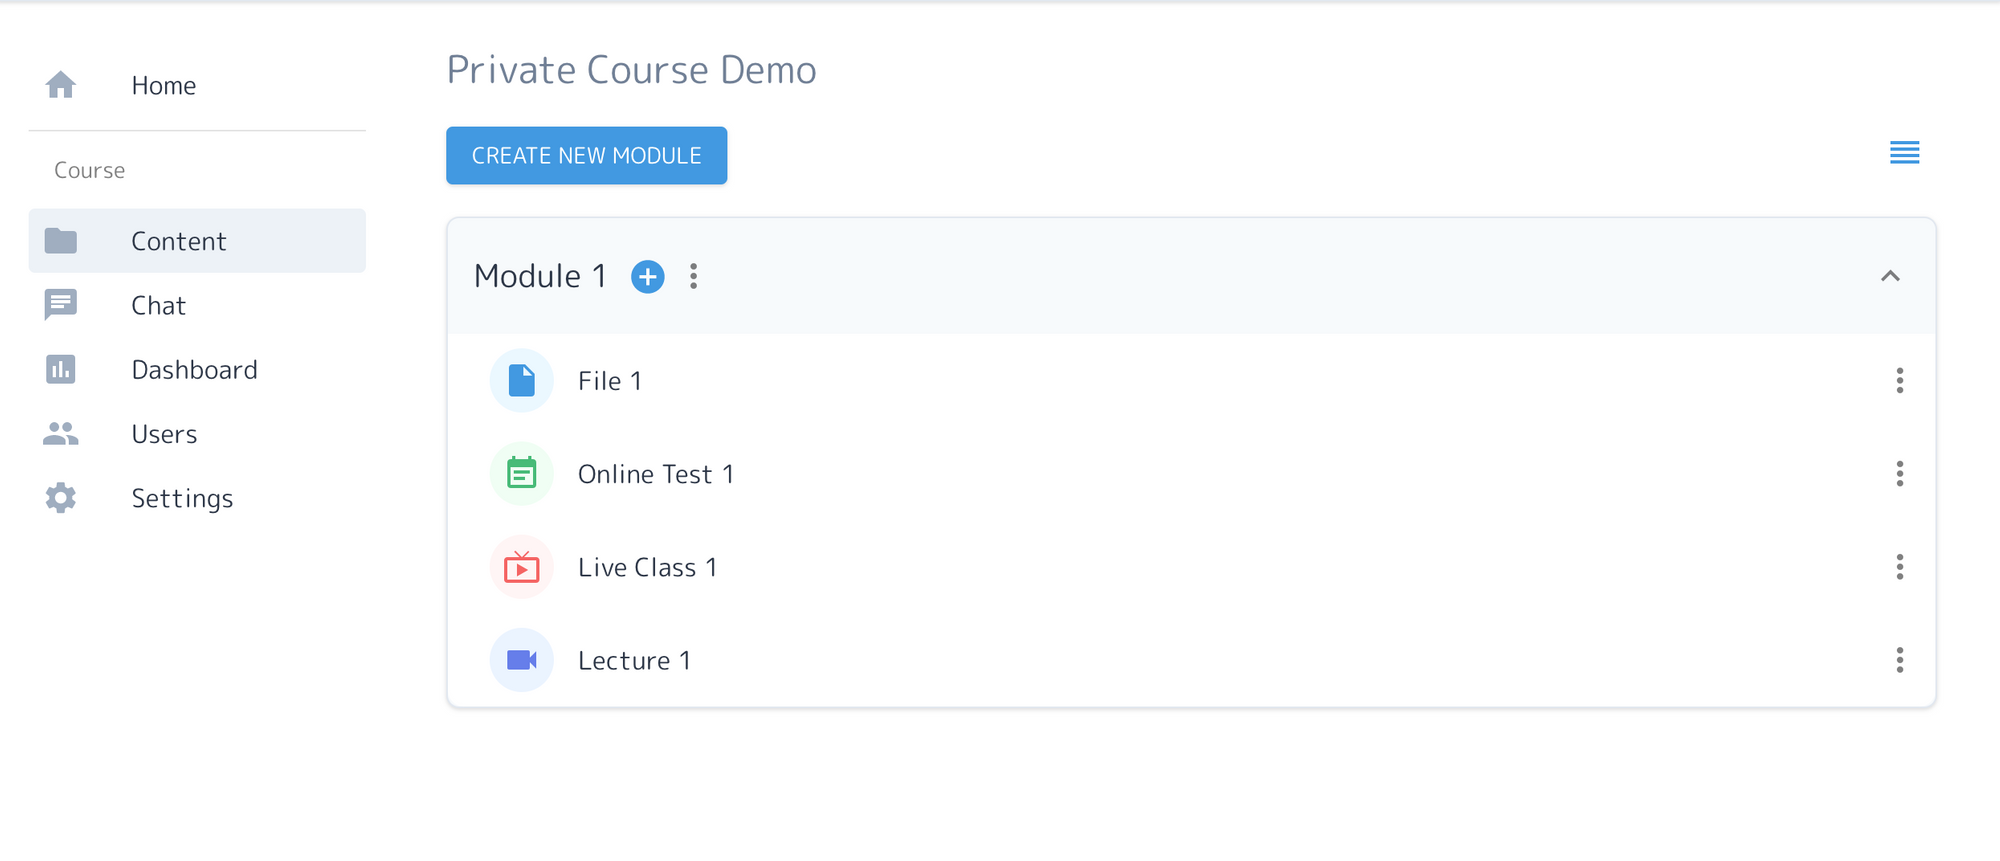
That's it. You can now upload files, video-lectures, create online tests, conduct live classes, use online chat and so much more.

Happy Teaching :)
Using Ylurn, teachers and educational institutes can create and sell online courses/programs under their own brand (website/app). Try the product for free.

